Follow our Wood Kit Installation Instructions for an easy experience installing your beautiful and functional new metal staircase.
When you receive your kit stair, unpack it and make sure you have received all of your parts according to your proposal order we have sent you. It will show you the number of treads; balusters; landing; handrail and guard rail. (Fig. 1A)

There is only one specialty tool (optional) for this installation. A magnetic pencil (Fig. 1C).You will need a drill & drill screw bits and a drill extension with a Phillips bit; claw hammer; rubber mallet; level; measuring tape; extension cord and small set of tools (wrenches and socket set) and a ladder. (Fig. 1B)

First unpack your box of parts and the center column from the cylinder tube.
After you unpack your center column and the short center column extension, unwrap your landing and lay the center column with the rail bolts on the floor and match the holes on the landing with rail bolts on the center column (they both should have letters on them) (Fig. 2A)

Insert the rail bolts threw the holes of the landing and then with a rubber mallet drive the landing down into the center column until it is snug to the center column. (Fig. 2B)
Next match the rail bolts with the column extension making sure to match the letters together. (Fig. 2C)

Next your going to need the magnetic pencil for this part of the installation, first put the hex nut on the end of the magnetic pencil then with a small screw driver guide the nut onto the rail bolt and screw in the nut just enough to get a 9/16” box wrench and tighten the hex nut, follow the same procedure on the rest of the rail bolts. (Fig. 3A)
Next stand the center column with the landing into the position where you want the stair to be at and screw in one bolt on the end of the landing parallel to the center column (Fig. 3B) (tip: level the center column on plum or at least close to it before you bolt the first screw) next level the center column and landing and fasten the bottom anchors on the base plate and the remaining screws on the landing.
Your stair should look like this. (Fig. 3C)

Start at the bottom of the stair, each mortise on the center column has a number in it; match the number on the center column with the number on the tread. Beginning with the # 1 tread. (Fig. 4A)
Next insert the tread into the mortise (Fig. 4B); put the hex nut in the round hole and (Fig. 4C) screw the hex nut to the rail bolt and tight it down with a 9/16” box wrench, follow the same procedure on the remaining treads (Fig. 4D) all the way to the top.
Your stair should look like this. (Fig. 5A)

The first baluster you be installing will be the starter baluster (Fig. 5B) it has a round base on the bottom of it. All balusters and treads are number like, also the bottom portion of the baluster is called a riser leg, on these riser legs there will be a number and a arrow with a predrilled hole. (Fig. 5C)
Unscrew the baluster from the riser leg and slide the riser leg underneath the tread with the arrow facing the front of the tread which is call the nosing, it is very IMPORTANT for the arrow to face the nosing.
Next with one hand hold the riser leg in place and with the other hand screw in the baluster all the way down until it is tight (Fig. 5D), if the top of the baluster angle is not sloping down towards the nosing (Fig. 5E) the arrow on the riser leg is not facing the nosing. Also make sure that the baluster is parallel with the nosing. (Fig. 5F)

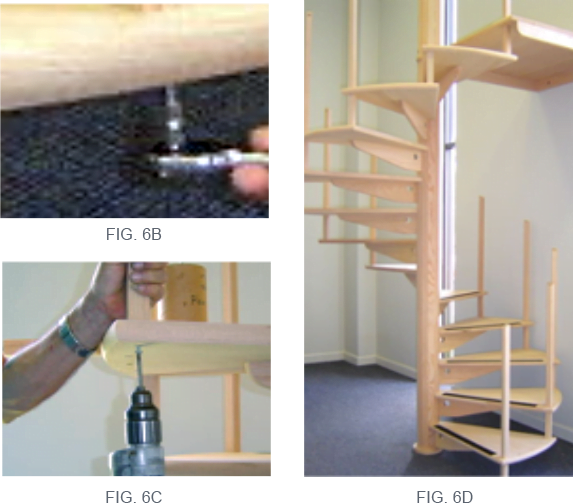
Next will be the # 2 main baluster, this one and the remaining balusters will not have round bases at the bottom. Like before slide the riser leg from the first tread underneath to the second tread and repeat the procedures as before, make sure you point the arrow towards the nosing of the tread. On this part of the installation you will need a small ratchet (Fig. 6A) for the 2” round head screws (supplied) for the bottom balusters on the first tread (Fig. 6B) (a drill will not fit underneath the first tread) if you don’t have a ratchet you can use a small Phillips screw driver (tip: to make it a little easier to screw in these screws get a bar of soap and apply a little bit to the treaded part of the screw, you only need to do this when using a hand screw driver). On the remaining treads you can use a drill to fasten the screws underneath the treads into the balusters. (Fig. 6C)
Follow the same procedures for the remaining balusters.
Your stair should look like this (Fig. 6D)
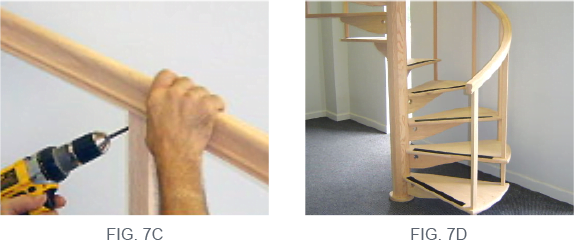
On this part of the installation you will need another person to help hold the handrail while you fasten the screws into the handrail. Next pre-start the 1 ½” Flat head screws (supplied) into each baluster; this makes it easier to fasten the handrail without fumbling around looking for the screws. (Note: this handrail comes in two pieces, you will install one piece at a time) The first one has a rail bolt at the end which will screw into the 2nd one. Starting at the bottom or the stair; lay the handrail on top of the main balusters and align the first baluster screw with the hole in the handrail (Fig. 7A) (make sure you are using the 1 ½” Flat head screws and not the 2” round head screws) Next screw the 1 ½” flat head screw into the handrail (Fig. 7B) Follow these procedures for the remaining balusters.(Fig. 7C)
The bottom half should look like this. (Fig. 7D)

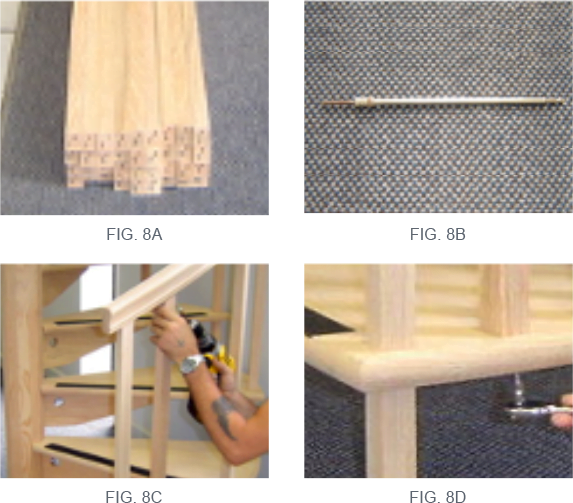
This stair there has three center balusters each one has a number on them, they are three different sizes (Fig. 8A), again you will use the 1 ½” flat head screw for the handrail application and the 2” screw for the bottom of the tread to the baluster. You will need a drill extension on this part of the installation (Fig. 8B) this will allow you to get into tight spaces. Start with the short # 1 baluster, using the 1 ½” flat head wood screw fasten the baluster to the handrail (Fig. 8C) then from underneath the tread into the baluster, here you will use the small ratchet with the Phillips screw bit, if you don’t have a ratchet use a small hand screw driver, only on the first tread (Fig. 8D)
Follow the same procedure for the remaining balusters.
Your stair should look like this (Fig. 8E)
On the top part of the first handrail section you installed is a rail bolt at the end. (Fig. 9A) Next you will need someone to hold the 2nd section of the handrail while you fasten the 9/16” hex nut to the handrail with the rail bolt. (Fig. 9B) On this part of the installation you will need the magnetic pencil again to start the hex nut to the rail bolt. (Fig. 9C) After you have the hex nut started use a 9/16” box wrench to tight down the hex nut. (Fig. 9D) Make sure that the handrail is flush before you tighten it down. Next fasten the balusters to the handrail as before.
After that installed the center balusters as before. Your stairway is now complete and should look like this.